Showing posts with label Cupcakes. Show all posts

Monday, August 20, 2012

'Star Wars' Cupcakes ~ William's 6th Birthday


During the school holidays our little man 'William' turned six years old!  He chose 'star wars' for the party theme this year! I pretty much had no idea what to do until I saw the awesome cupcake toppers 'Royal Bakery' had made, I knew I just had to make some too! They are very easy to make using the 'star wars' cookie cutter and plunger set, cut the shapes out of fondant or chocolate then it's just a matter of painting on the details...


William thought they were just great, and what a beautiful sunny day it was too! All the family travelled out to celebrate and have lunch with us, the birthday boy was extremely excited with all the star wars lego he was gifted! {not to mention all the other pressies...very spoilt!}


He was sooo stoked with this Darth Vader mask he was given, complete with breathing sounds!
We decorated the party table with some of his star wars lego and mini figures and of course loads of his favourite chocolate! The Darth Vader in the background was made with a plastic mask from spotlight and my cutting cape {used for hairdressing} we just pinned them onto the blind.   
Hope you all had a great weekend, thanks for stopping by!


Friday, January 6, 2012

Fondant Cupcake Toppers! {NOTICE}


I have been busy creating lot's of different designs for my cupcake toppers lately...the popularity of the humble cupcake is still riding high and why wouldn't it be when you can decorate them with cute, edible handmade sugar decorations like this little kitty! 
Last year I had to turn down quite alot of cupcake orders as I didn't have enough time to bake all the cakes required, so this year {aswell as my usual decorated cakes, cupcakes, cookies & stationery} I will be offering for sale my edible cupcake decorations on thier own for you to adorn your own  cupcakes! Prices will vary according to level of difficulty and a minimum order of one dozen will apply, please e mail me for a quote I would love to hear from you! Pick up, delivery or postage will be avaiable for you.


Monday, September 5, 2011

'Sweet Music' 80th Birthday Cupcakes


Here is a cupcake tower I created a couple of weeks ago for an 80th Birthday celebration at Cafe Jacqui's in Warwick.  This lady loved the piano and anything musical so I was asked to do a keyboard design and musical notes.


I made a 'keyboard' cake topper to sit on top of the stand  which simply read 'happy 80th birthday'


The little sheets of music I made out of fondant and then applied the pattern
using a cocoa transfer sheet to keep it all edible. 


When we arrived at the venue to set this one up the tables were decorated with the same sheet music as I had on the cupcakes (you can see them in the bottom left hand side of this photo) so it all tied in together really nicely!
Congratulations and 'Happy 80th Birthday' Betty.


Monday, August 8, 2011

Wild {Zebra} Cupcake Tower!


This wildly cute cupcake tower was created for a little girls 6th birthday celebration over the weekend.  Inspiration for these cute zebra toppers came from 'Two Sugar Babies', I made them out of fondant icing and hand painted on the details using super black food colour.


I used the same method for the leopard print toppers...


and I also painted stitches around the numeral toppers to tie it all together, these one's were sprinkled with edible glitter aswell...for extra cuteness ;-)


This theme would be just as nice in bright blue or green for the little boys! 
Presented on a four tiered acrylic cupcake stand to one of my
regular customers in Warwick ;-) 


Happy 6th Birthday Taylor! 
{we hope you had a FUN party}

Monday, June 27, 2011

'No Swimming!' Shark Cupcakes


My son will be turning five on the holidays, so we made some cupcakes to take to Prep and share with his class last week. The shark and fins are fondant icing and Willy's favourite cake is chocolate mud so that's what they were and we also had to make some vanilla ones and some without icing so he had everyone covered (sheeesh!)


William was very excited  to take these!  I can't believe he will be five years old tomorrow, we had family around on the weekend to celebrate...he chose a  'Mario Bros' themed cake and we made some cool ticket style invitations, I will share all the details in the coming days.
Have a great day!

Thursday, June 16, 2011

The Cupcake Blog

Remember these?....


Well I was so excited today when Amanda emailed me to say my burger & chips cupcake picture would be featured HERE on  'The Cupcake Blog'!  along with many other peoples lovely cupcakes :)  They also appear HERE on thier facebook page,
 thankyou Cupcake Blog... you've made my day!


Tuesday, May 3, 2011

21st Birthday Cupcake Tower {Samantha}


Over the weekend I created some cupcakes for a 21st birthday celebration in Toowoomba.  These were large butter flavoured cupcakes with generous swirls of vanilla icing.


The personalised banners were hand stamped, cut and shaped from purple fondant.


I also used purple fondant for the little five petel flowers...


and for the numbers, white fondant dipped with silver edible glitter {also called rainbow or disco dust if your looking to buy some} these were so sparkly and pretty!


I also used some more glittery goodness on these purple icing swirls, hard to see in these pictures I know!


Displayed on my four tiered clear perspex stand and hopefully enjoyed by the guest of honour :)
Happy 21st Birthday Samantha!


Tuesday, March 15, 2011

Safari Cupcake Tower {David's 50th Birthday}


Over the weekend we celebrated my brother-in-law's 50th birthday. We decided to go with a cupcake tower so we didn't have to fuss over cutting it up and serving it around.  He enjoys hunting so the safari theme was perfect.


The cupcake toppers are fondant icing cut out with a round cutter, I then hand painted on the designs with food colouring. These cupcakes are chocolate mud and I also did some butter cakes topped with a few reeds of grass.


The cutting cake is chocolate mud, covered in fondant tinted 2 parts yellow and 1 part brown {incase your wondering} finished off with rope trim, I used moss green florist tape to trim the board for this one as it went perfectly with the grass.


The animal toppers are store bought ones:)  but I thought were perfect!


{The lighting was not so good for photos of the finished product, but I thought you would still like to see it}
We delivered and set this one up on a clear five tier acrylic stand at QLD Gun Exchange in east Brisbane.  We then stayed on and had a fantastic night out...
Happy Birthday David! 

Saturday, January 29, 2011

Beef Burger & Chips {cupcakes & cookies}


I have had these on my 'to do' list for quite some time, I first saw this idea over on flikr {a photo sharing site} and thought ....I have to make some!  So here are my version of  little beef burgers and chips, hamburgers & fries or whatever you like to call them. I think they are so cute and very simple to put together...make some today your kids will go nuts over them, mine did :) 


All you need for these is a batch of plain cupcakes, take them out of the wrapper and cut them in half, brush the tops with a little water and sprinkle on some sesame seeds for that authentic burger bun look;) and fill it with whatever you like, I used chocolate cake baked in a slice tray and cut into circles with a cookie cutter and the rest is icng....no fancy piping bags needed just use ziplock bags, snip off the corner and squeeze it on!


What about those salty looking chips!  Whip up a batch of your favourite cookie dough, roll into an oblong shape cut in half horizontally and then cut vertically into lots of strips and sprinkle on some sugar before they go into the oven, my daughter is not a big fan of icing so she just loved these.

These would definately go down a treat for boys parties! or any party for that matter, I hope you make some.
I will be posting these photos and a few more in the cupcake album on my facebook page.


Monday, January 3, 2011

Happy New Year!

I would like to wish everyone a Happy New Year! and say a big 'Thank you' to all of my family, friends, followers, email subscribers and fans for supporting, encouraging and commenting on my cake decorating, paperie and blogging for the past year {and more recently my facebook page}.  I hope you stick around for what looks to be a very busy year ahead for my cakes.

{fantastic dinosaur cupcakes from the latest Planet Cake Cupcakes book}
You may have noticed my new pages for bookings and deliveries, I am also working on a basic price guide and a few other things to help cut down on some of the emailed questions I am frequently asked. I welcome any suggestions you might have or requests for anything in particular you would like to see on this blog?  Leave a comment to let me know!

Sunday, October 31, 2010

Happy Halloween! {cute cupcake ideas}

{image via HWTM}

How cute are these little monster cupcakes from the book "What's New Cupcake" I love it, the first book is called "Hello Cupcake" equally as good, the only problem in recreating some of their cupcakes is finding the particular lollies that are used here in Australia.  These would be so good for little boys monster parties or birthday cupcakes for school!

{image via HWTM}

Another variation....string monsters! 


{image via google}

Here is the book, if your into baking you will love this book, so many great and different ideas!!
Read on for the instructions on how to make the fur ball and string monster cupcakes...

FUR BALL MONSTERS


Ingredients:
- 12 vanilla cupcakes baked in orange, green, and purple paper
- 12 mini vanilla cupcakes, paper liners removed
- 1 can (16 oz) vanilla frosting
- Neon green, orange, and purple food coloring
- 24 mini lollipops (Dum Dums), unwrapped
- 24 peach or green apple gummy rings (O’s)
- 24 brown mini candy coated chocolates (M&M’s Minis)
- 12 assorted color candy-coated chocolates (M&M’s Minis).


Directions:
1. Spoon 2 tablespoons vanilla frosting into a small ziplock bag. Divide the remaining vanilla frosting among three bowls and tint each a different color with the food coloring. Spoon each color of frosting into a separate ziplock bag, press out the excess air, and seal the bags..


 2. Insert a lollipop stick through a gummy ring, pushing it through the candy from the center to outer edge. Bring the gummy ring up around the lollipop, like a bonnet, to make the eyes. Continue with the remaining gummy rings and lollipops..


3. Snip a small (1/8-inch) corner from the bags with the frostings. Pipe a dot of tinted frosting on top of the standard cupcakes. Place a mini cupcake on top, flat side down. Starting at the edge of the standard cupcake and using the tinted frosting, pipe furn with a squeeze-release-pull action. Continue until the entire exposed cupcake assembly is covered. Repeat with the remaining cupcakes and colored frosting..

 4. Insert 2 like-colored lollipop eyes into the top of each cupcake assembly. Pipe a dot of vanilla frosting in the center of each lollipop and add a brown candy for the pupil. Add a colored candy to the top of the frosting for the nose. Repeat with the remaining lollipop eyes and cupcakes..


STRING MONSTER VARIATION:
Follow steps 1 and 2 above. Snip a small (1/8-inch) corner from the bags with the frosting. Pipe a dot of tinted frosting on top of the standard cupcakes. Place a mini cupcake on top, flat side down. Pipe the tinted frosting all over the cupcakes to make the string, making sure to cover cupcakes completely. Continue with step 4 above.

For more great ideas and party inspiration be sure to visit the Hostess with the mostess blog!

Wednesday, October 6, 2010

Pink Ribbon Boxed Cupcakes


Here are my pink ribbon cupcakes{October is Breast Cancer awareness month}, boxed up and ready to go.  The mini 'happy birthday' labels are part of my new 'Chic Pink' range for Top That! Paperie.


I will be making these mini labels into a DIY printable file which you will be able to download for FREE! and print off at home, so keep an eye out for my next post!


These are mini sized cupcakes and are the perfect fit for my smallest cupcake boxes!


Have a great day! and thanks for looking :)

Monday, August 9, 2010

Pink Pony Birthday Party! {and Pony Cake}


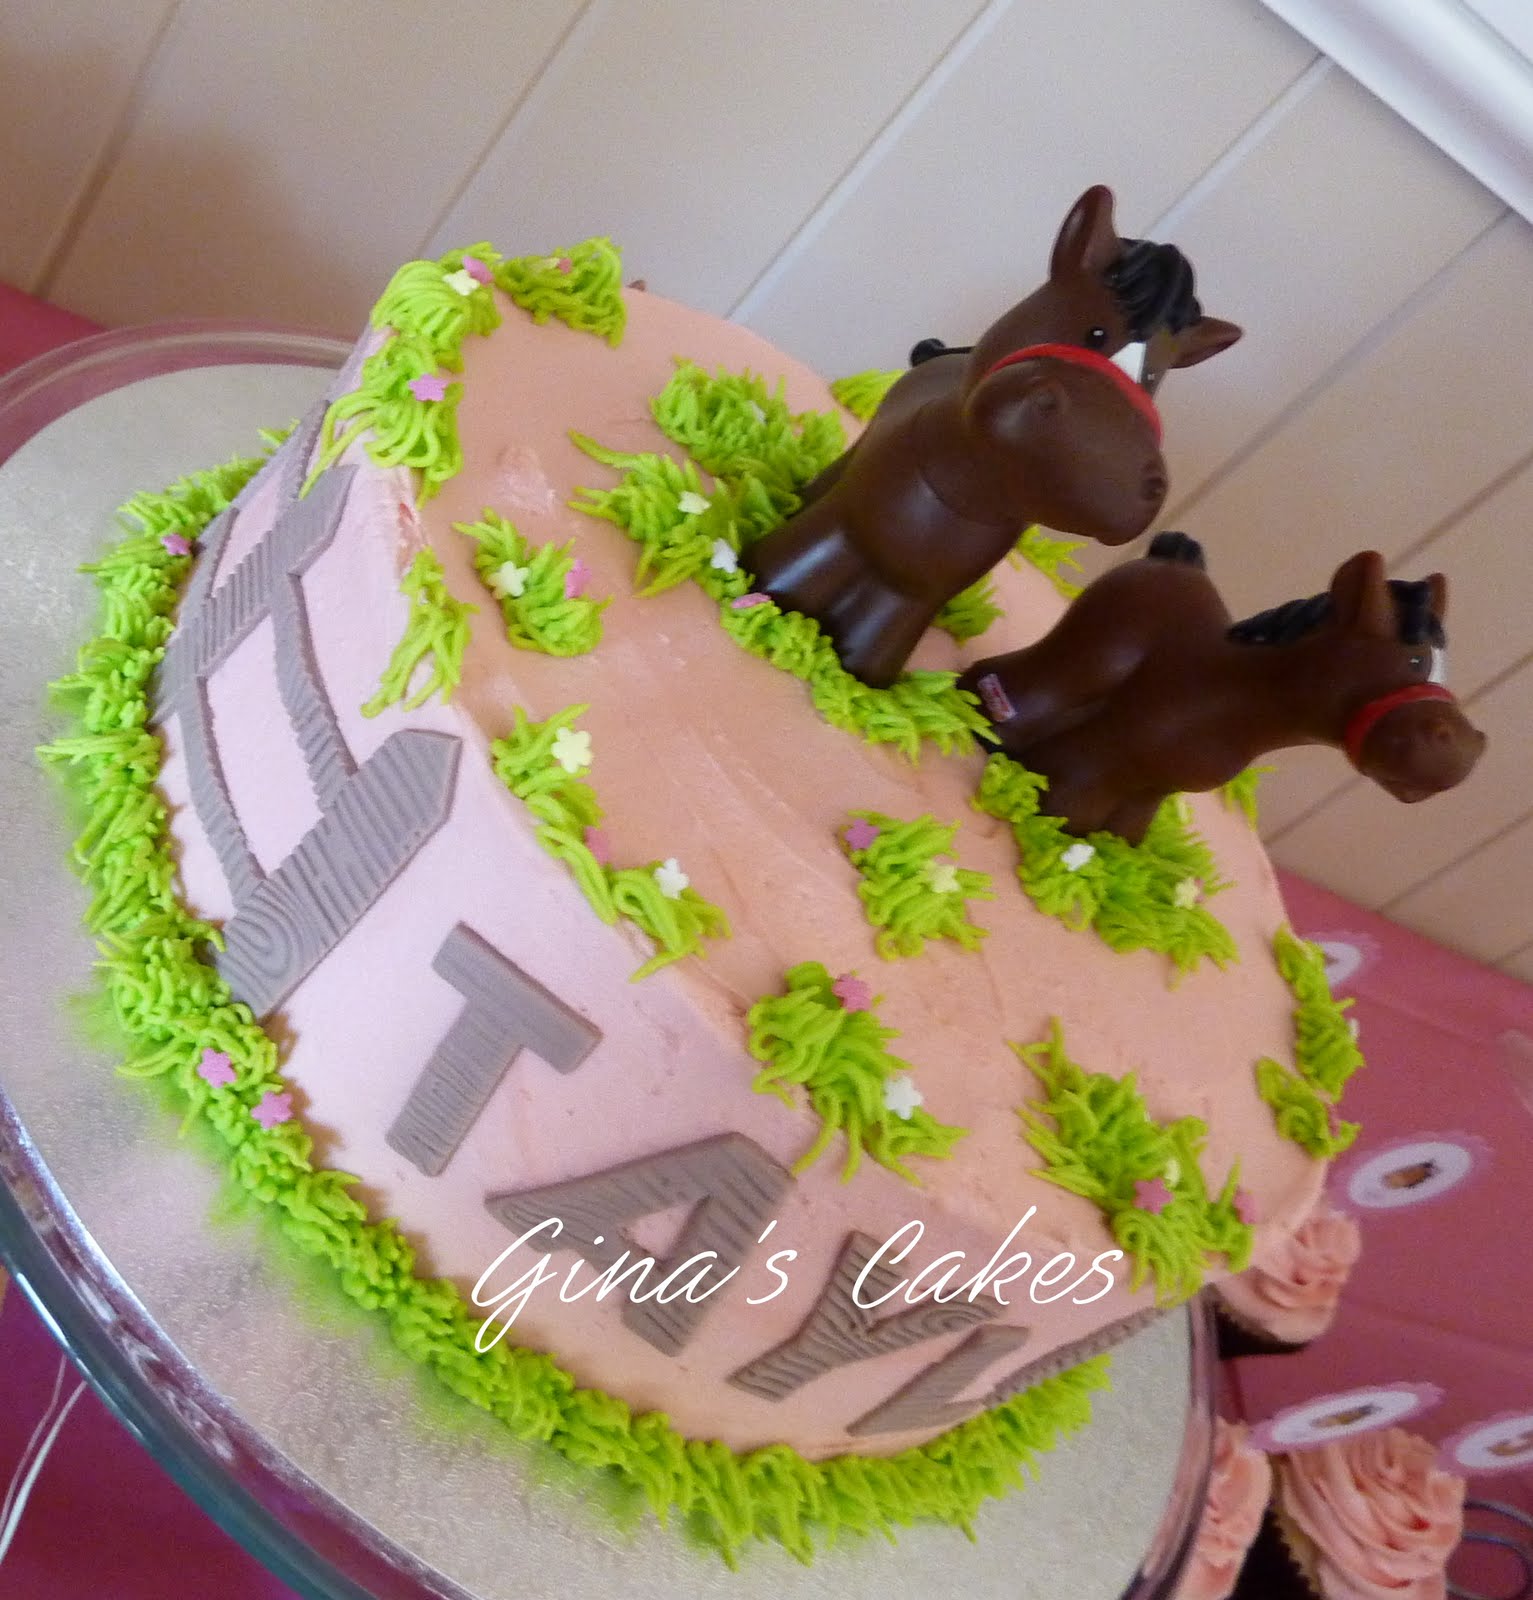
I recently had the pleasure of creating a party table using my 'pink pony' paper collection for my friends little girl Taylor.  I also made a pony cake, some cupcakes and some cute little ice cream cone cakes...Taylor's Mum was filling the table up with lot's more delicious treats, fairy bread, watermelon, strawberries and much more! I have plenty of photos to share...


I made a little fence to go  around the cake and tiny little sugar flowers in pink, white and yellow. The two ponies are from the little people collection which you can buy at Big W.

Custom made 'pink pony' pennant banner with matching gingham ribbon.

Custom made 'pink pony' table signs are sold as a set of six, these are printed on quality cardstock and fold out to stand up on their own. These could also be used for placecards personalised with your guests names.


Custom made 'pink pony' bag toppers, these are available for 10cm or 15cm bags
 and are also sold as a set of six.


Here are the treat bags I created, the labels of course are part of the 'pink pony' collection available as a set of six, the brown paper bags are available at spotlight and the gingham bows I made from fabric strips cut out with pinking shears.  Taylor's Mum filled these to the brim with all sorts of girly treats!

This little sign reads 'take me home', the bales of hay really topped it off {thanks Dean!} 
All of my paper products are available to purchase individually or as a complete package and will all be listed in my shop which is coming soon!! Until then you can still order or enquire via email. 


Ice cream cone cupcakes!  I love making these and have made many different styles...mmm yum!


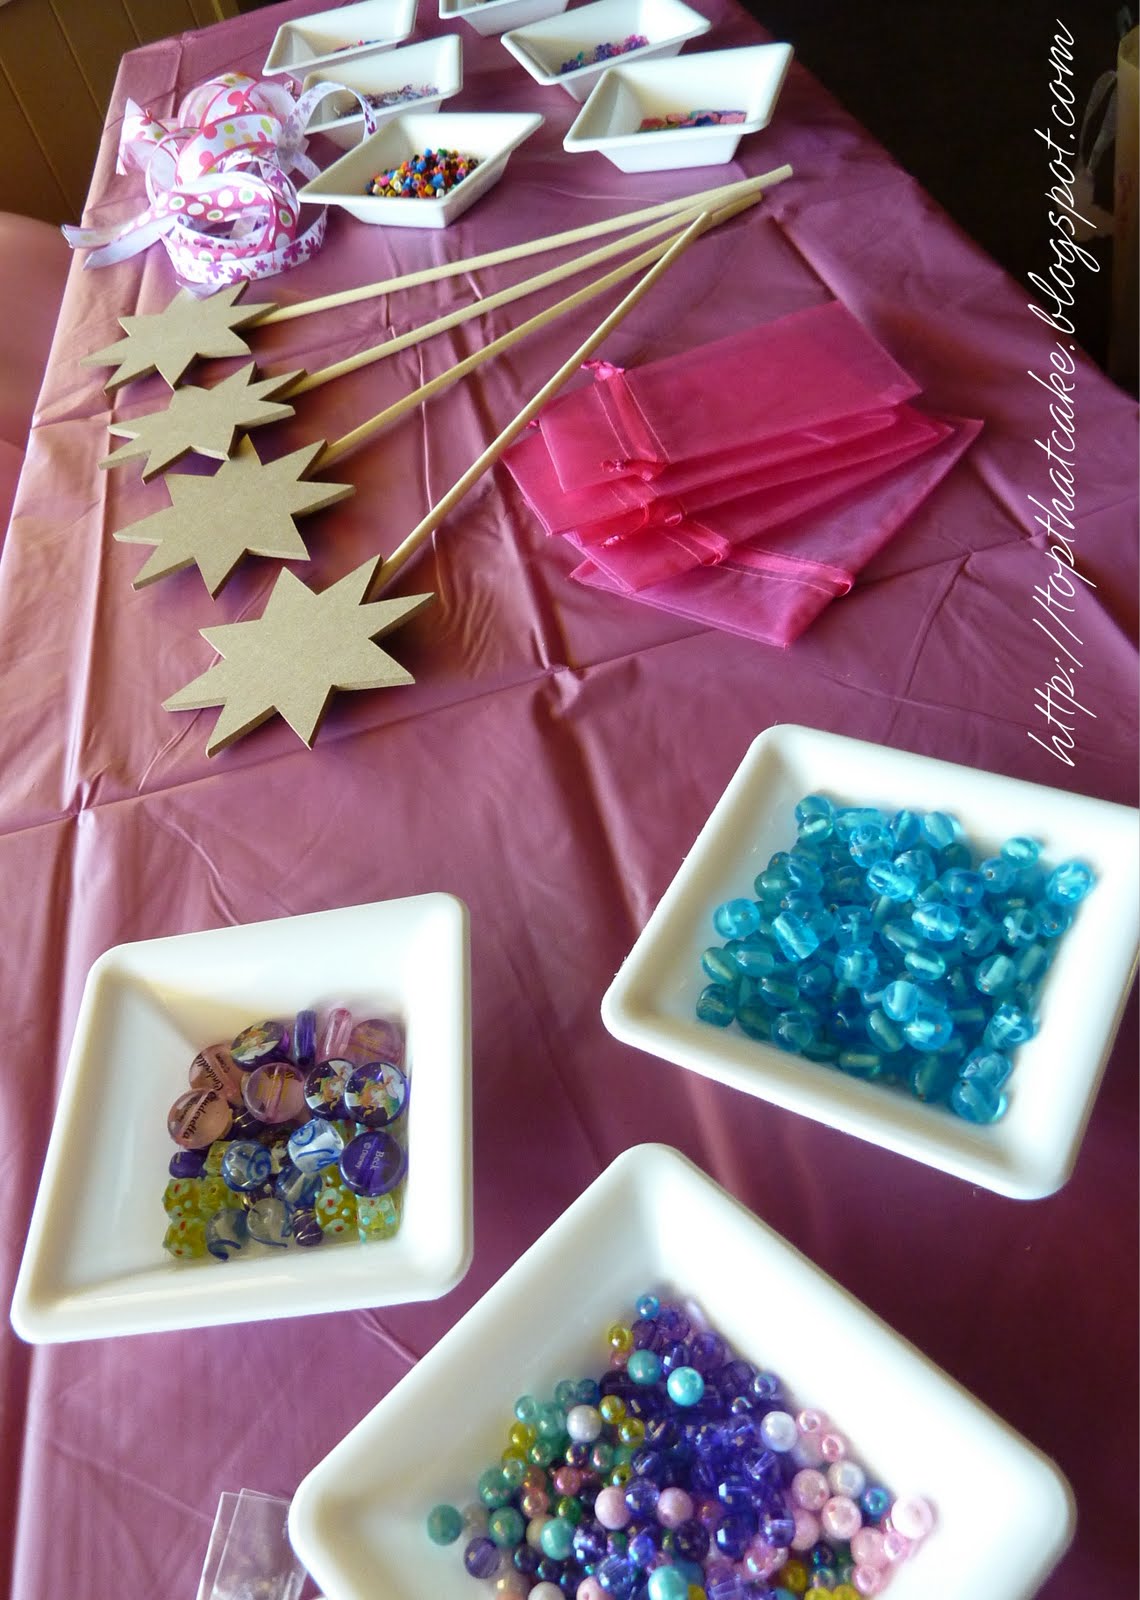
Alana {Taylor's Mum} set up a craft table for the girls complete with fairy wand decorating, beading/jewellery making, she even had pink organza bags for thier completed goodies
to go in ready to take home! 


Happy Birthday Taylor!
Related Posts Plugin for WordPress, Blogger...